2023. 4. 9. 17:35ㆍDev/EKS
AWS EKS에서 AWS Load Balancer Controller를 사용해 CLB(Classic Load Balancer), NLB(Network Load Balancer), ALB(Application Load Balancer)를 만들어 보겠습니다.

AWS Load Balancer Controller란?
Elastic Load Balancer를 Kubernetes cluster에서 관리하도록 도와주는 컨트롤러
전에는 AWS ALB Ingress Controller 라는 이름으로 불렸으며
지금은 AWS Load Balancer Controller라는 이름으로 변경했습니다.
크게 두 가지 기능을 합니다.
1. Kubernetes Ingress 리소스에서 Application Load Balancer를 프로비저닝할 수 있도록 만들어줍니다.
2. Kubernetes Service 리소스에서 Network Load Balancer를 프로비저닝 할 수 있도록 만들어줍니다.
AWS Load Balancer Controller를 ALB Controller로 줄여서 부르면
Application Load Balancer의 줄임말인 ALB와 헷갈리므로 주의합니다.
인터넷에 검색하면 예전 이름인 AWS ALB Ingress Controller도 등장해 더 피곤합니다.
비슷하게 Network Load Balancer와 Nginx Ingress Controller도 헷갈리니 조심합니다.
프로젝트 이름은 Ingress NGINX Controller가 맞는데 Docs는 Nginx Ingress Controller로 되어 있습니다.

AWS Load Balancer Controller를 설치한 후에 아래와 같은 방식으로 사용할 수 있습니다.
ALB - Ingress - Service - Pod
NLB - Service - Pod
Nginx Ingress Controller를 추가로 설치하면 아래와 같은 방식으로도 사용 가능합니다.
NLB - Ingress-Nginx - Service - Pod
AWS의 Elastic Load Balancing 제품에는 4가지 Load Balancer가 있습니다.
- Application Load Balancer
- Network Load Balancer
- Gateway Load Balancer
- Classic Load Balancer
기본적인 제품 비교는 아래와 같습니다.
| Feature | Application Load Balancer |
Network Load Balancer |
Gateway Load Balancer |
Classic Load Balancer |
| Load Balancer type | Layer 7 | Layer 4 | Layer 3 Gateway + Layer 4 Load Balancing |
Layer 4/7 |
| Target type | IP, Instance, Lambda | IP, Instance, Application Load Balancer | IP, Instance | |
| Terminates flow/ proxy behavior |
Yes | Yes | No | Yes |
| Protocol listeners | HTTP, HTTPS, gRPC | TCP, UDP, TLS | IP | TCP, SSL/TLS, HTTP, HTTPS |
| Reachable via | VIP | VIP | Route table entry |
자세한 내용은 공식 문서를 참고하세요
https://aws.amazon.com/ko/elasticloadbalancing/features/?nc=sn&loc=2&dn=1
네트워크 트래픽 분산 - Elastic Load Balancing - Amazon Web Services
aws.amazon.com
EKS 클러스터 프로비저닝
EKS 클러스터를 생성하는 다양한 방법이 있지만 여기서는 eksctl을 이용해서 만들겠습니다.
0. 사전조건
kubectl과 eksctl, awscli를 설치합니다.
https://docs.aws.amazon.com/eks/latest/userguide/install-kubectl.html
https://docs.aws.amazon.com/eks/latest/userguide/eksctl.html
https://docs.aws.amazon.com/ko_kr/cli/latest/userguide/getting-started-install.html
1. eksctl을 사용해서 spot으로 eks 프로비저닝 (15분 정도 소요됩니다.)
eksctl create cluster --name my-cluster --spot

2. Aws Load Balancer Controller를 위한 IAM Policy 생성
https://docs.aws.amazon.com/eks/latest/userguide/aws-load-balancer-controller.html
이 페이지를 참고해서 아래 명령어를 실행합니다. (버전 확인)
aws iam create-policy \
--policy-name AWSLoadBalancerControllerIAMPolicy \
--policy-document file://iam_policy.json
위 두 명령어는 클러스터가 생성되기 전에 진행해도 됩니다.
eksctl utils associate-iam-oidc-provider --cluster my-cluster --approve
eksctl create iamserviceaccount \
--cluster=my-cluster \
--namespace=kube-system \
--name=aws-load-balancer-controller \
--role-name AmazonEKSLoadBalancerControllerRole \
--attach-policy-arn=arn:aws:iam::111122223333:policy/AWSLoadBalancerControllerIAMPolicy \
--approve
클러스터가 생성된 후 eksctl utils와 create 명령어를 사용합니다. (숫자 부분을 자신의 aws 계정 12자리로 바꿔서 사용합니다)

3. AWS Load Balancer controller 설치
설치 방법은 Helm과 Kubernetes manifest를 이용하는 방법이 있습니다.
여기서는 helm을 이용합니다.
helm repo add eks https://aws.github.io/eks-charts
helm repo update
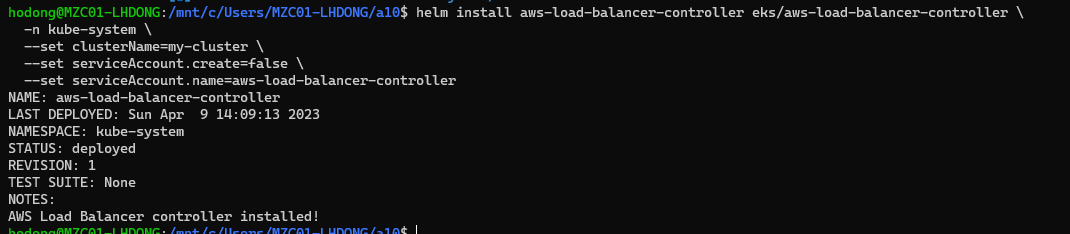
helm install aws-load-balancer-controller eks/aws-load-balancer-controller \
-n kube-system \
--set clusterName=my-cluster \
--set serviceAccount.create=false \
--set serviceAccount.name=aws-load-balancer-controller
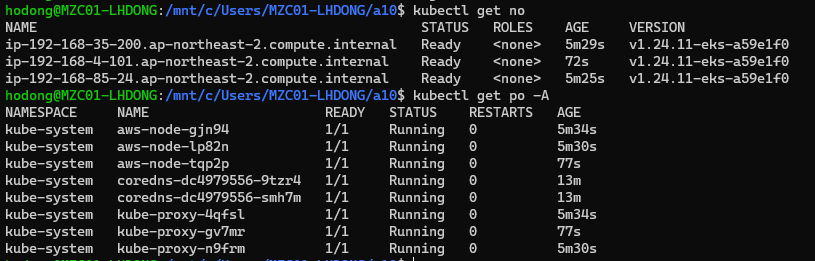
kubectl get deployment -n kube-system aws-load-balancer-controller
위 kubectl 명령어로 잘 설치되었는지 확인합니다.


helm list -n kube-system 또는 helm list -A 로 설치된 버전을 확인합니다.
이 글은 v2.4.7의 AWS Load Balancer Controller를 설치했습니다.
v2.5.1 이후 AWS Load Balancer Controller는 기본값으로 service type LoadBalancer를 만들면 NLB를 프로비저닝 합니다.
CLB를 만드려면 helm chart value에서 enableServiceMutatorWebhook 값을 false로 설정해야 합니다.
4. CLB로 nginx pod 노출
예제 deployment와 service 생성은 chatGPT의 도움을 받았습니다.
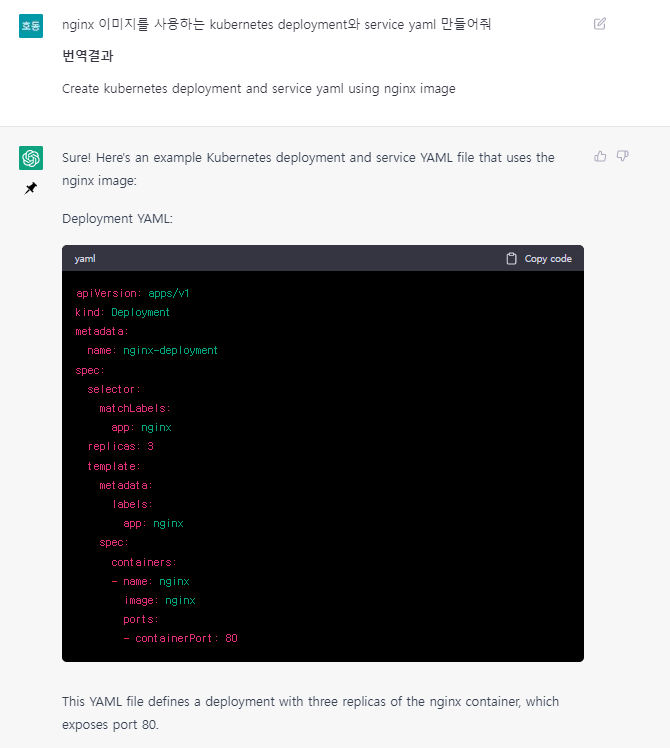

아래 코드를 deployment.yaml, service.yaml로 저장합니다. (저장하는 파일의 이름은 상관 없습니다.)
apiVersion: apps/v1
kind: Deployment
metadata:
  name: nginx-deployment
spec:
  selector:
    matchLabels:
      app: nginx
  replicas: 3
  template:
    metadata:
      labels:
        app: nginx
    spec:
      containers:
      - name: nginx
        image: nginx
        ports:
        - containerPort: 80
apiVersion: v1
kind: Service
metadata:
name: nginx-service
spec:
selector:
app: nginx
ports:
- protocol: TCP
port: 80
targetPort: 80
type: LoadBalancer
그리고
kubectl apply -f deployment.yaml
kubectl apply -f service.yaml
명령어로 클러스터에 apply 합니다.
저는 kubectl apply -f . 를 사용했는데
.는 현재 디렉토리에 있는 모든 파일을 의미합니다.

service(줄여서 svc)와 pod(줄여서 po)를 확인합니다.
nginx-service의 external-ip를 복사합니다.

curl 명령어로 확인하거나
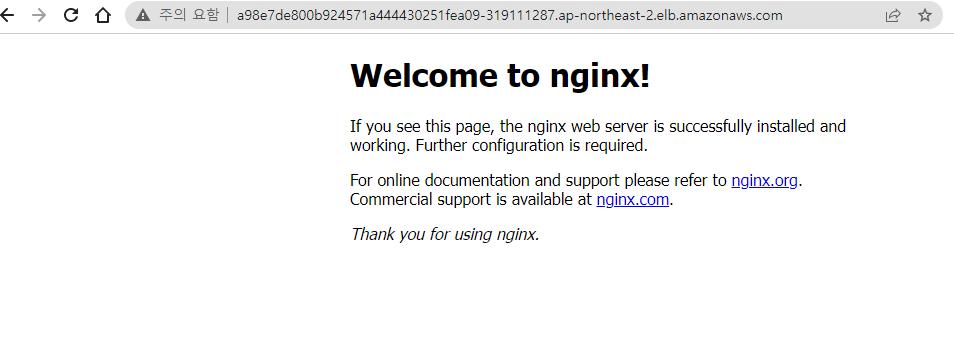
웹브라우저에서 확인할 수 있습니다.
aws console에서도 Load balancer를 확인할 수 있습니다.
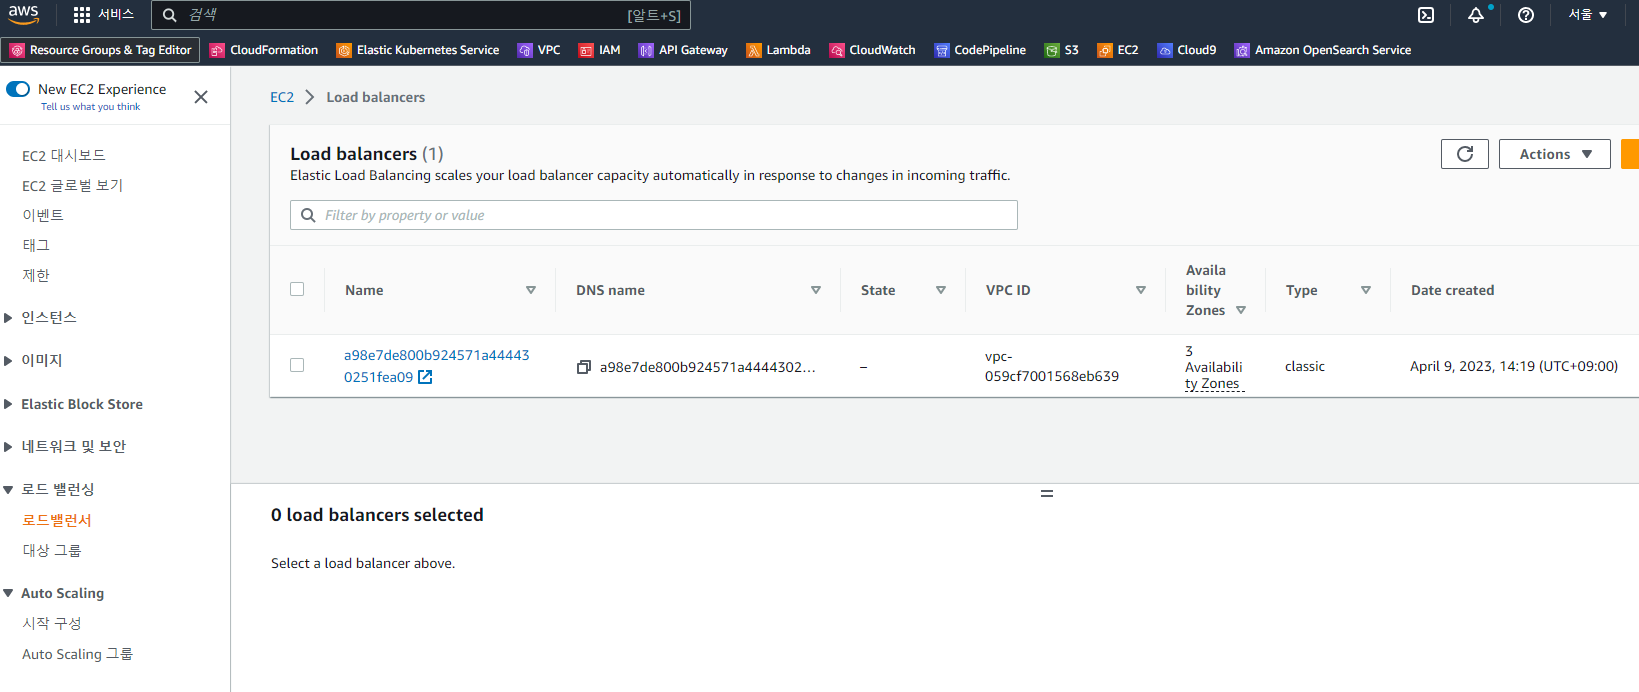
하지만 aws에서는 이제 classic type의 로드밸런서보다는
application load balancer와 network load balancer로 목적에 맞게 구분해서 사용하길 권장합니다.
그래서 이제 alb와 nlb를 각각 만들어 보겠습니다.
5. NLB를 사용해서 앱 노출
https://kubernetes-sigs.github.io/aws-load-balancer-controller/v2.4/guide/service/nlb/
Network Load Balancer - AWS Load Balancer Controller
AWS Load Balancer Controller supports LoadBalancerClass feature since v2.4.0 release for Kubernetes v1.22+ clusters. LoadBalancerClass feature provides a CloudProvider agnostic way of offloading the reconciliation for Kubernetes Services resources of type
kubernetes-sigs.github.io
공식 문서를 참고해서 가장 기본적인 NLB를 만들어보겠습니다.
apiVersion: apps/v1
kind: Deployment
metadata:
  name: deployment-two
spec:
  selector:
    matchLabels:
      app: two
  replicas: 3
  template:
    metadata:
      labels:
        app: two
    spec:
      containers:
      - name: webapp
        image: kodekloud/webapp-color
        ports:
        - containerPort: 8080
        env:
        - name: "APP_COLOR"
          value: "green"
---
apiVersion: v1
kind: Service
metadata:
  name: service-two
  annotations:
    service.beta.kubernetes.io/aws-load-balancer-scheme: internet-facing
    service.beta.kubernetes.io/aws-load-balancer-nlb-target-type: instance
spec:
  selector:
    app: two
  ports:
  - protocol: TCP
    port: 80
    targetPort: 8080
  type: LoadBalancer
  loadBalancerClass: service.k8s.aws/nlb
deployment에서는 kodekloud/webapp-color 이미지를 사용했습니다.
코드는 https://github.com/kodekloudhub/webapp-color 에서 확인 가능합니다.
loadBalancerClass 속성은 Kubernetes v1.24에서 추가된 옵션입니다.
clb와 다른 점은 service에서 annotations를 이용하는 점입니다.
AWS Load balancer controller v2.2.0부터 NLB는 기본적으로 internal입니다.
그래서 internet-facing으로 만들기 위해 annotations에
service.beta.kubernetes.io/aws-load-balancer-scheme: internet-facing
추가합니다.
또 NLB는 기본적으로 target-type이 instance입니다.
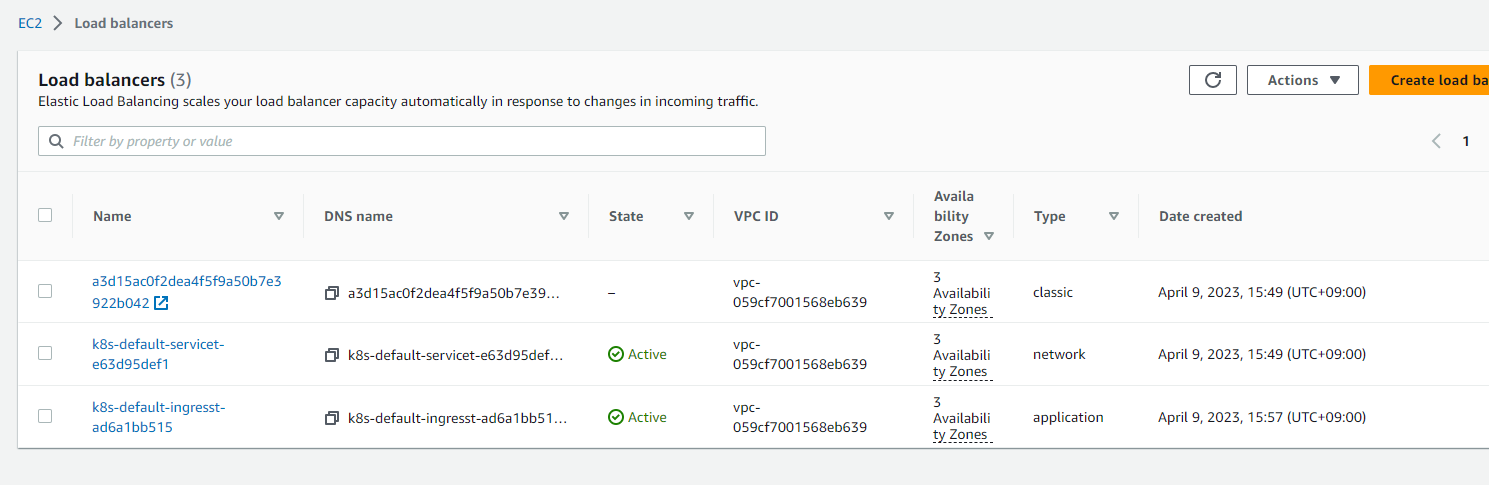
ip와 instance의 차이는https://stackoverflow.com/questions/66539203/what-are-the-practical-differences-between-an-ip-vs-instance-based-target-types여기서 확인해보세요kubectl apply 하면 service-two로 external-ip 가 k8s-default-service~로 시작하는 NLB가 생성됩니다.


aws 콘솔에서도 network type으로 로드밸런서가 생성된 것을 확인할 수 있습니다.clb와 달리 state도 확인 가능합니다.
6. ALB를 사용해서 앱 노출
apiVersion: apps/v1
kind: Deployment
metadata:
  name: deployment-three
spec:
  selector:
    matchLabels:
      app: three
  replicas: 3
  template:
    metadata:
      labels:
        app: three
    spec:
      containers:
      - name: webapp
        image: kodekloud/webapp-color
        ports:
        - containerPort: 8080
        env:
        - name: "APP_COLOR"
          value: "blue"
---
apiVersion: v1
kind: Service
metadata:
  name: service-three
spec:
  selector:
    app: three
  ports:
  - protocol: TCP
    port: 80
    targetPort: 8080
  type: NodePort
---
apiVersion: networking.k8s.io/v1
kind: Ingress
metadata:
  name: ingress-three
  annotations:
    alb.ingress.kubernetes.io/scheme: internet-facing
    alb.ingress.kubernetes.io/target-type: ip
spec:
  ingressClassName: alb
  rules:
    - http:
        paths:
        - path: /
          pathType: Prefix
          backend:
            service:
              name: service-three
              port:
                number: 80
CLB, NLB와 달리 service의 type은 NodePort로 하고 ingress resource가 추가됩니다.
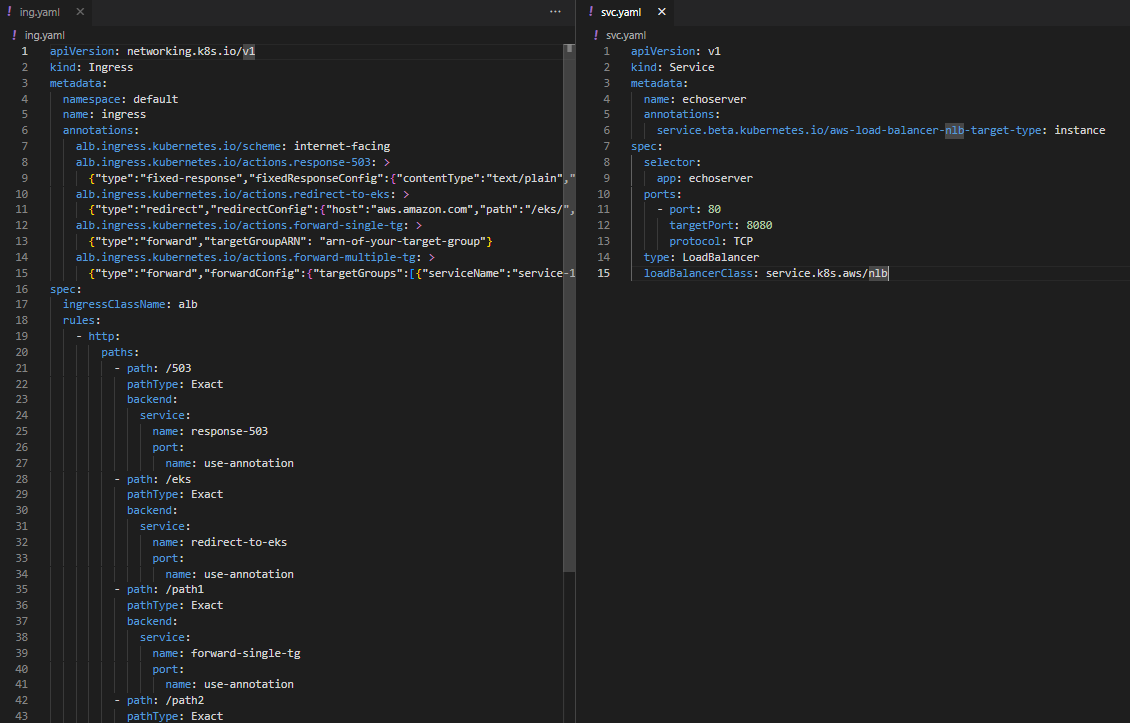
annotations에 쓸 수 있는 옵션은 https://kubernetes-sigs.github.io/aws-load-balancer-controller/v2.4/guide/ingress/annotations/ 에서 확인 가능합니다.
ingressClassName은 Kubernetes v1.18 부터 추가된 속성입니다.
kubectl get ingressclass 로 확인할 수 있습니다. aws load balancer controller 설치 할 때 기본값이 alb이고
옵션을 줘서 다른 이름으로 설치 가능합니다.
kubectl get ingress 명령어로 확인 가능합니다.


7. 삭제
AWS Load Balancer Controller는 Kubernetes Service로 CLB와 NLB를, Ingress로 ALB를 관리합니다.
그래서 EKS 클러스터를 삭제하기 전에
kubectl delete ingress <ingress이름>
kubectl delete svc <svc이름>
명령어를 사용해서 리소스를 먼저 지워줍니다.
그리고 eksctl delete 명령어로 cluster를 삭제해줍니다.
eksctl delete cluster --name my-cluster
eksctl이 아니라 aws console > eks 에서 삭제를 하면
cloudformation에 불필요한 스택이 남아있게 됩니다.
ingress와 service리소스를 지우기 않고 eks 클러스터를 지우면

클러스터는 삭제되어도

ALB는 지워지지 않습니다. (CLB, NLB는 알아서 삭제되었네요)
콘솔에서 직접 삭제해줍니다.
사용한 코드는
https://github.com/nauco/eks-sample
에서 확인할 수 있습니다.
'Dev > EKS' 카테고리의 다른 글
| AWS EKS에서 NGINX Ingress rewrite annotation 사용하기 (2) | 2023.05.01 |
|---|---|
| AWS EKS에 ALB를 이용해 여러 서비스 연결하기 (0) | 2023.04.22 |
| eksctl pods are unevictable from node 에러 해결하기 (0) | 2023.02.28 |
| AWS EKS를 쉽게 쓰는 방법, AWS EKS Blueprint (0) | 2022.07.07 |
| eks ingress로 alb 생성 실패 해결 과정 (0) | 2022.05.11 |